DriverPacks Base integration program was created to mainly integrate drivers and eventually triggers an automated or unattended installation of Windows. Therefore before going further into this tutorial, I hope that you are aware of the basics of creating an unattended Windows Setup CD.
This integration program will take all the individual DriverPacks you want to integrate or slipstream (term used by Microsoft for integration) into your 32-Bit Windows 2000 / XP / 2003 Server source.
Here we are going to use Windows XP Professional SP3 CD
First of all you will be needing few items for our recipe listed below -
1. Windows XP SP3 CD
2. DriverPacks
5. nLite Add-ons
nLite integrator will be used to integrate the applications, hotfixes, service packs prior to finally proceed to make a Bootable CD / DVD out of source so as to save us the time from downloading and then installing packages.
So to get started, you have to create folders named DriverPacks, WinCD & WinISO under C:\

Then copy DPs_BASE_1006.exe self-extracting archive in C:\DriverPacks folder.

Now copy the required and downloaded DriverPacks in C:\DriverPacks\DriverPacks (where DriverPacks is a folder inside a folder named DriverPacks in C:\ where you have already extracted the DPs_BASE_1006.exe). Below you can find the screenshot that should resemble yours.

Now run 'DPs_BASE.exe' in C:\DriverPacks and it will open up a window shown below. Click on the 'greater than' that implies next.

Click next on the 'UpdateChecker for NT5 DriverPacks' window.

Click Next on the 'Settings' window too.

In the 'Select Location of platform' window select 'Disc'.

Click on 'Browse'.

Now under 'Location' it will automatically detect and verify the Windows installation files. Click 'Next'.

Now you will find all the drivers listed if you have put all the driver packs related to XP in C:\Driverpacks\DriverPacks\. Here you can select the required drivers for your installation or all of them and click on 'Next'.

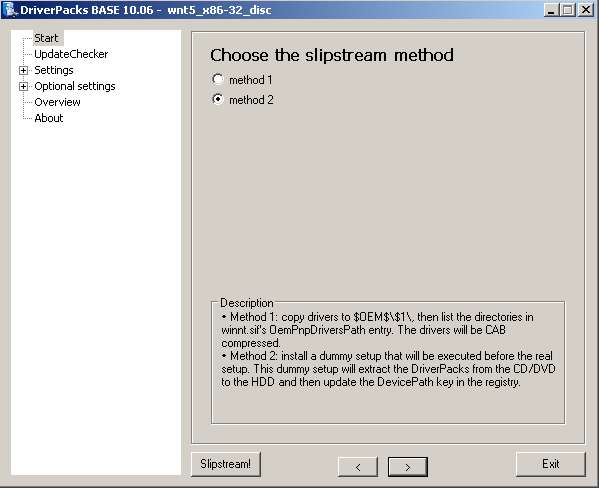
In 'Choose the slipstream method' window choose 'method 2' and click on 'Next'.
Now in 'Choose the method to start the Finisher' window select 'GUIRunOnce' and click 'Next'.

Just click 'Next' on 'Optional settings' window.

Select 'DISABLE KTD' on 'KTD' window and click 'Next'.

Click 'Next' on KTD settings window.

Select 'Enable QSC (Recommended)' on 'QuickStream Cache' and click 'Next'.

Leave the defaults i.e. 'Disabled' for DriverPack Graphics A (ATI & Nvidia) and click on 'Next'.

Click 'Next' on 'Overview of settings' and click 'Next'.

Finally click on 'Slipstream!' on About the DriverPacks BASE window.

The integration process begins.

Click 'OK' when there is a message stating that the slipstream has finished.

Now run nLite and click 'Next'.

Locate the Windows XP source as destination i.e. C:\WinCD

Click 'Next' on the 'Presets' window.

At 'Task Selection' window select 'Hotfixes, Add-ons and Update Packs', 'Drivers', 'Unattended' and 'Bootable ISO'. Click on 'Next'.

On 'Hotfixes, Add-ons and Update Packs' window click on 'Insert' and add all the required nLite add-ons. As you can see in the below screenshots. Click on 'Next' when you are done.


Now we will be directed to 'Drivers' window, where you can click on 'Single driver'.

You might be wondering as to why did I choose to select Drivers in the Task Selection window. Well, DriversPack Base program can integrate only archives as you might have noticed. In nLite also we can integrate the drivers but we have to get the .inf file from the self-extracting archive packed drivers. It might sometimes become difficult to extract the archives and find the .inf file. Here below I have done Prolific USB to Serial Port Convertor driver integration using the .inf file.
Note: It's not compulsory to do this step as its only another alternate method that I have tried to show.

On clicking 'Next' we are directed to 'Unattended' window where we can go for all kinds of unattended questions asked during installation like Product Key, Regional and many more. You can explore and make a fully unattended installation without making it ask any of the prerequisites asked during installation. Click on 'Next' when you are done.


It will ask you to start the process and you may click 'Yes' to proceed further.

The process shall begin and you can view the progress and status.

Click 'Next' when it's finished.

On the Bootable ISO window you can select to 'Explore' and add some extra folders. As I chose to add some some additional software packages like Antivirus in the CD / DVD.
Note: These are not going to be integrated, but by doing this I can use this as my Extra Softwares Data CD / DVD.

After you are done with adding any extra packages, you can click on 'Make ISO' and select the destination path for the ISO.

ISO creation starts instantly.

And finally when our image is successfully created, now you can burn it to CD / DVD.

Click on 'Finish' to exit the wizard.

When you have burnt the cd open it up and make sure a folder called $OEM$ is in the root of the CD / DVD.
If everything goes well then you have just created a Ultimate Windows XP CD / DVD that can be installed on various platforms (applies only if you have selected all the drivers before slipstreaming).


